I Let Claude Into My AI Homelab (MCP Explained)
The whole reason I built my [AI homelab](/blog/how-i-built-my-ai-homelab) was to run AI locally. That's still the goal. But the first time I really tested it, I learned that the model is only one piece of the setup.
This post goes with the video above. It's about how I connected Claude Code to the knowledge base on my Raspberry Pi using MCP, what MCP actually is, and what leaves my homelab when I use it.
The question I should have asked
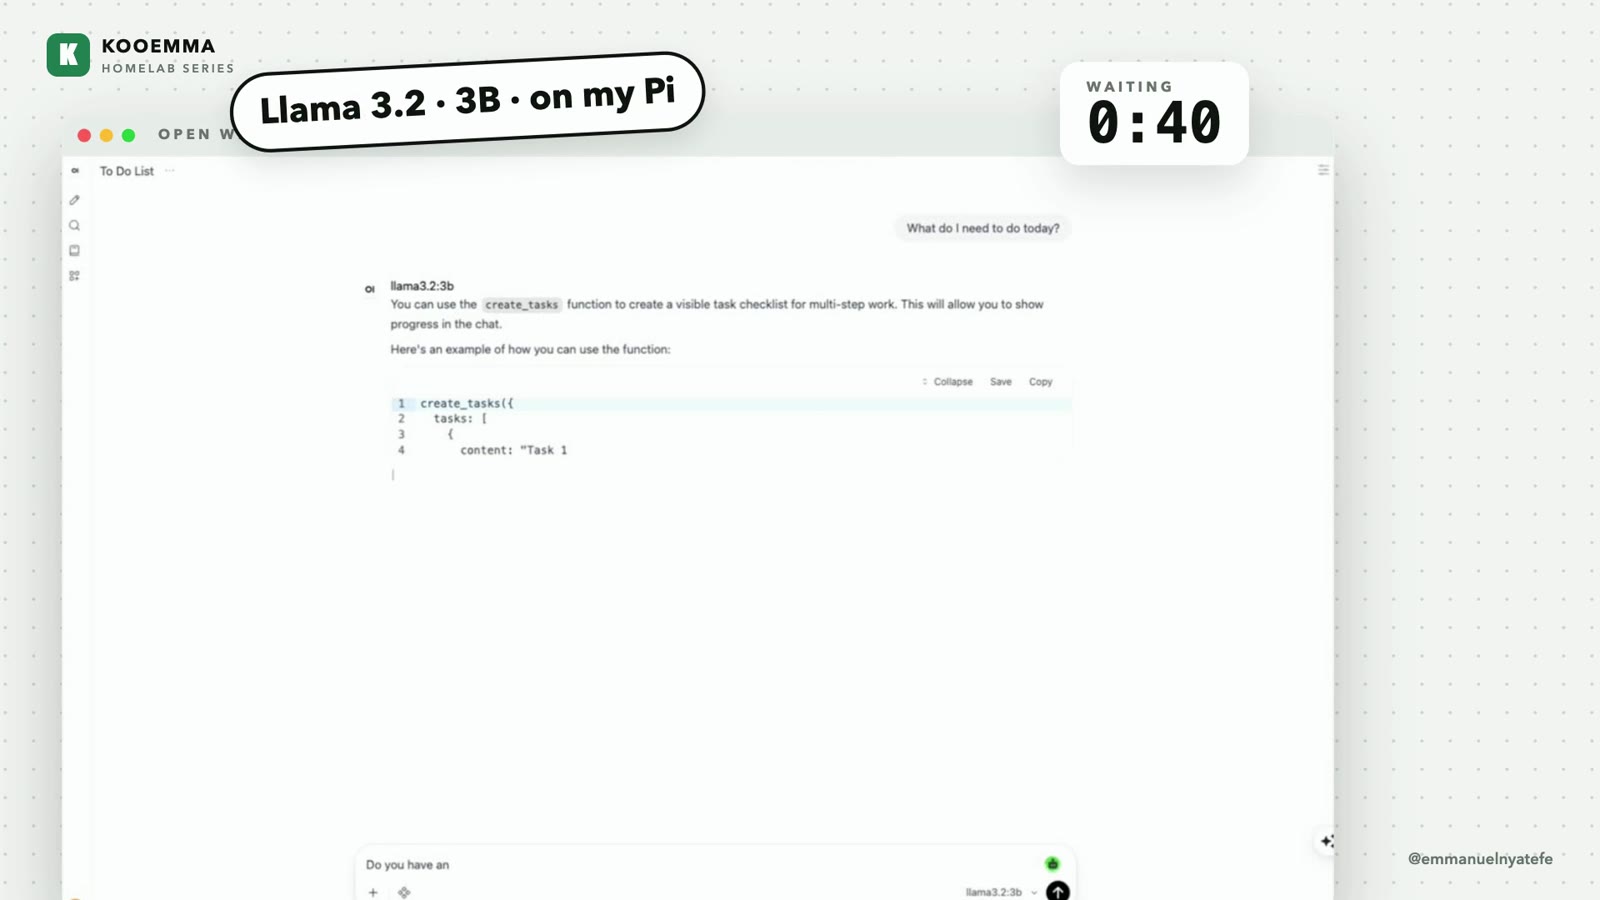
I asked Llama 3.2 3B, running on my Pi, "What do I need to do today?"
It took about 40 seconds. Then it gave me "Task 1, Task 2, Task 3" and explained how to make a to-do list. It had no idea what my day looks like.
That's two problems.
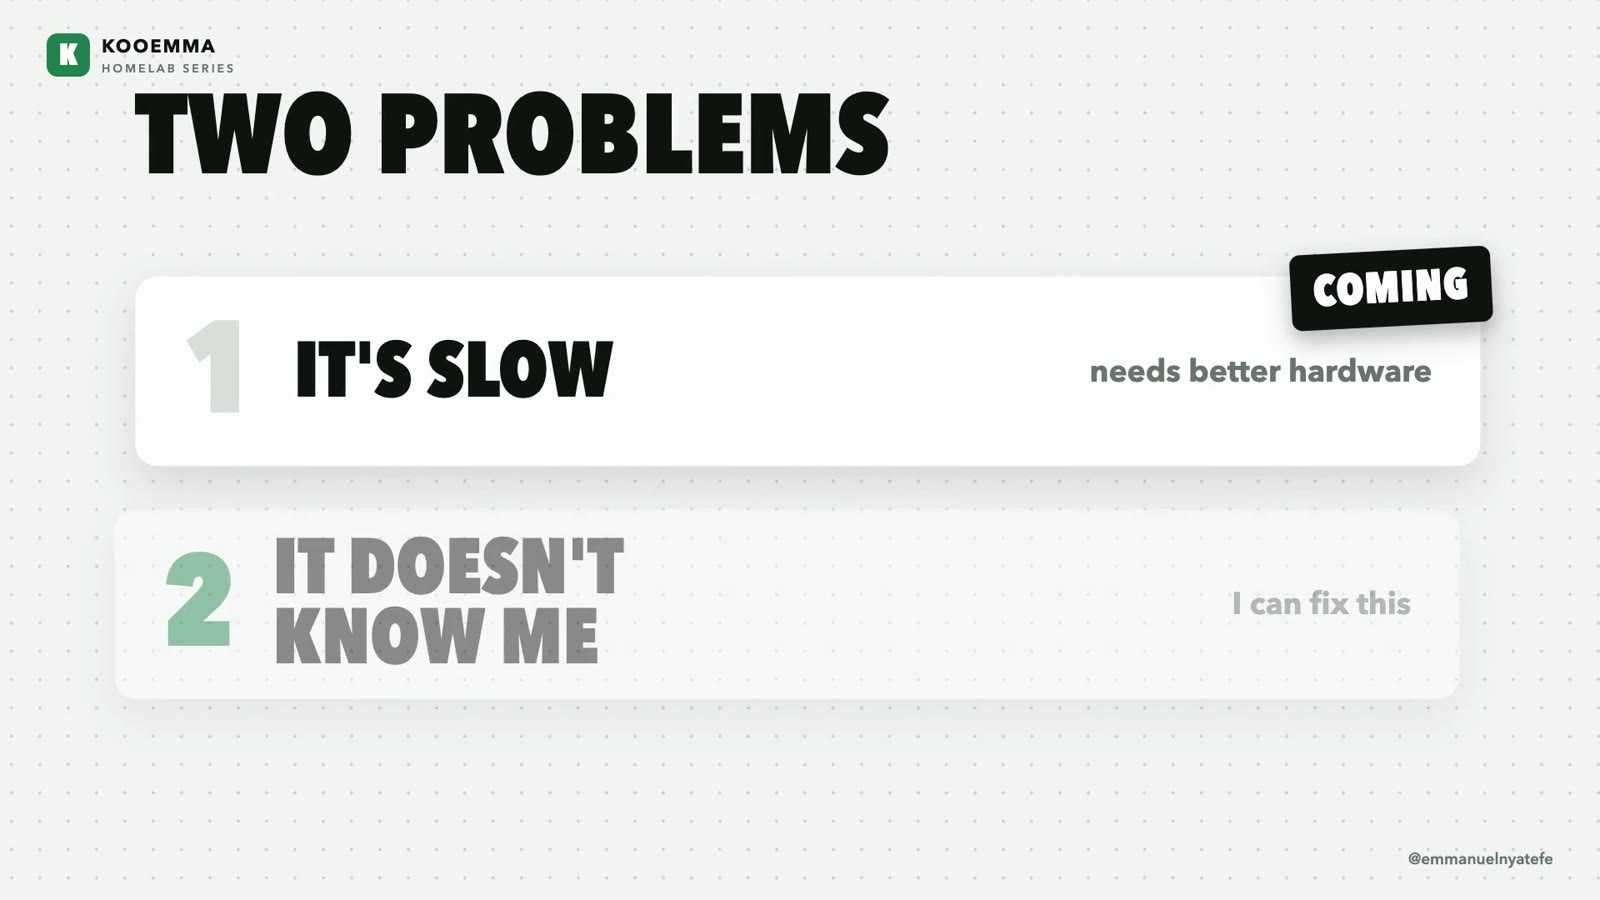
1. It's slow. That needs better hardware, and that's coming. 2. It doesn't know me. That's something I can fix today.
My tasks and notes already live in Koo, the knowledge base I built, which runs on the Pi. So until I can run a good model locally, Claude fills in. The real question was how to connect an AI to Koo in a way that still works when I swap Claude for a local model later.
What MCP is
That's what MCP is for. It stands for Model Context Protocol.
Think of hiring someone smart on their first day. They know a lot, but they don't know where anything is in your office. MCP is you showing them the filing cabinet and how to open each drawer.
There are two sides to it:
- The MCP client is the AI app you talk to. For me that's Claude Code on my Mac. - The MCP server is the thing that has your stuff and knows how to work with it. For me that's Koo, running in Docker on my Pi.
Because the client and the server only agree on how to talk to each other, I can change either side later. When I have hardware that runs a good model locally, Koo doesn't need to change at all.
How my setup works
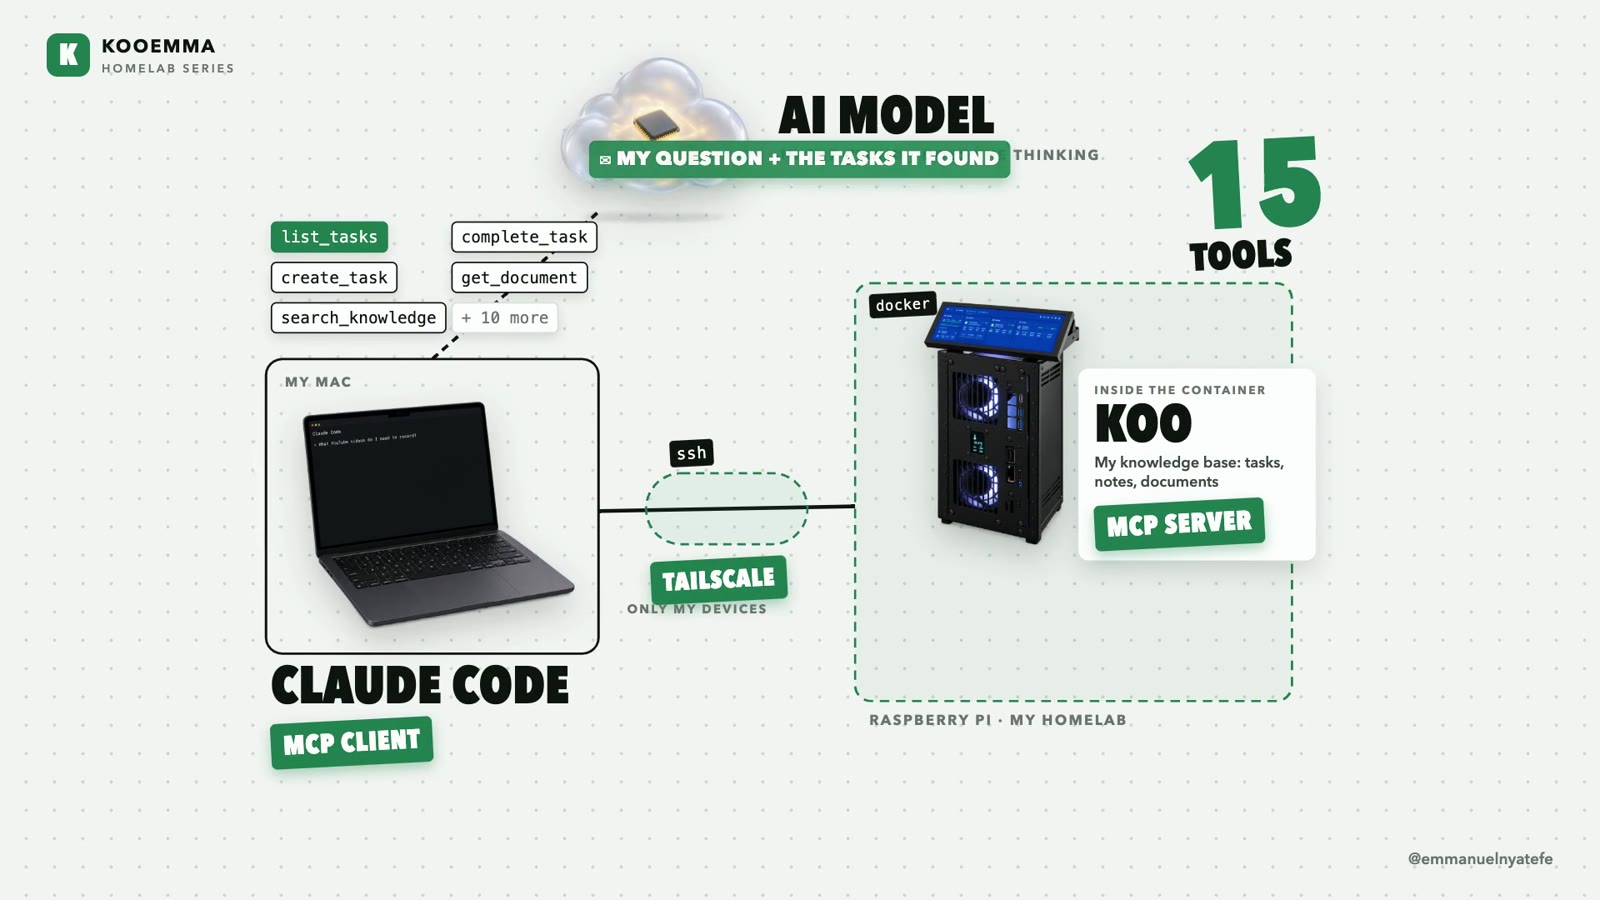
- Claude Code on my Mac is the MCP client. - Koo on my Pi is the MCP server, running in Docker. - The two talk over SSH, through Tailscale, so nothing on the Pi is open to the internet. - The AI model itself runs in the cloud for now.
The four steps of an MCP request
When Claude Code starts, it asks Koo, "What can you do?" Koo answers with its list of 15 tools, like list_tasks, create_task and search_knowledge.
Then every request follows the same four steps:
1. What can you do? Claude Code already has Koo's list of tools. 2. Pick a tool. I ask, "What YouTube videos do I need to record?" The model reads my question, checks the list, and picks list_tasks. 3. Ask me first. Before anything runs, Claude Code asks me to approve it. My passwords and keys stay on my side, so the model never sees them. 4. Run it. Claude Code sends the request to Koo on my Pi. Koo looks up my tasks and sends them back, and the model writes the answer.
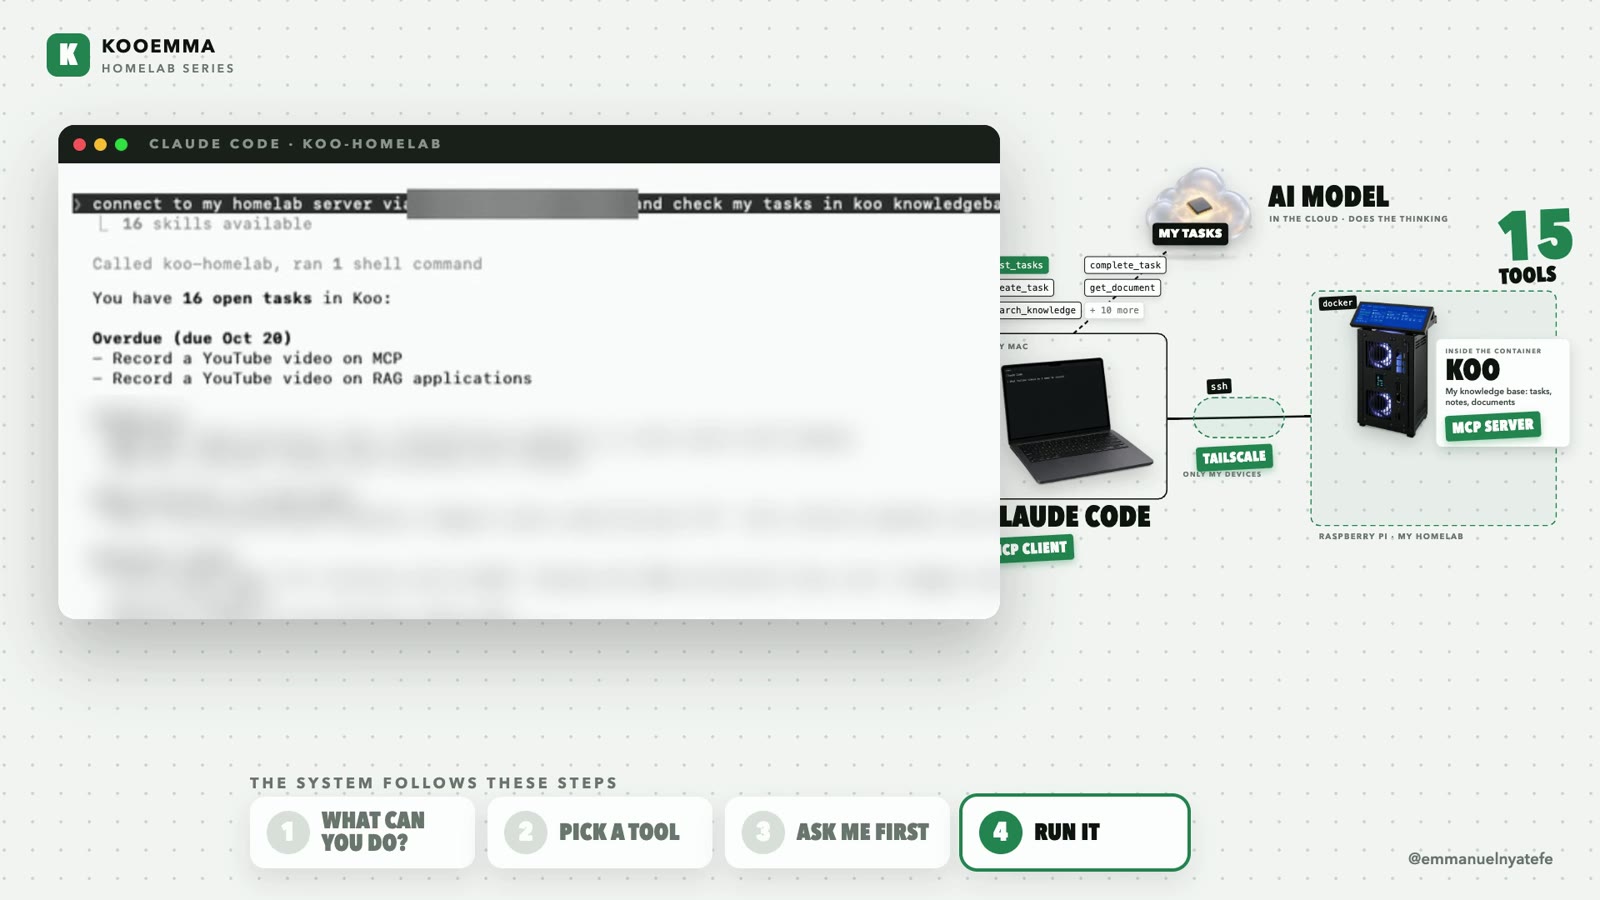
The answer was my actual list: the MCP video, and the RAG video. Adding a task works the same way, and it shows up in Koo straight away.
What actually leaves my homelab
This was the part I cared about most. My question goes up to the model, and so do the results Koo sends back for that question. Everything else stays on my Pi. The model never gets my whole knowledge base, only the answer to what I asked.
[!NOTE] Why not just upload everything to a chatbot? I could paste my notes into a chat, but then they live on someone else's server and I have to do it again every time something changes. With MCP, my notes stay in Koo, and the AI only sees what it looks up for a question I asked.
What's next
In the next video, I'll show how Koo finds answers across all my documents. That's called RAG. I'm also working on a step-by-step tutorial on building your own MCP server, the same kind I use here.
If you want to start from the beginning, the series goes:
1. [My First AI Homelab Build](/blog/my-first-ai-homelab-build): why I wanted one 2. [How I Built My AI Homelab](/blog/how-i-built-my-ai-homelab): putting it together 3. This one: connecting Claude to it with MCP
And if you want to build your own, the [full homelab guide](/blog/build-your-own-homelab) has every part and every step. Subscribe on [YouTube](https://www.youtube.com/@emmanuel-nyatefe) to catch the RAG video when it's out.